HONEYCOMB WALL PANEL MODULE
The Honeycomb modular system is meant to be an economic alternative to the cement-based blocks + reinforced concrete for corner columns and wall-top ring beams, construction. This is the most widespread preference all over the world, particularly in low-income, sub-urban areas. Not many other options can compete price-wise, including so-called “local” materials.
In an urban context the availability and the transport costs may rule out even adobe-compressed-earth alternatives which require the crucial clay component.
Bamboo as a permanent construction material, is now an economic alternative IF sourced and produced in an industrial scale. It’s fast-growing - 3-4 years for construction grade Ø 10 cm - even compared to planted pine species. And it´s still long-lasting IF treated against insects and mould with borax and boric acid.

The KnockedDown project
An interesting idea by a local contractor in Thailand, was based on bamboo prefab house components to be sold in flat packs, like in “Ikea-style”. The project was therefore known as “KnockedDown”. Just because it was typically an “out-of-the-box” concept it might have had success but finally put on hold because of market uncertainty.
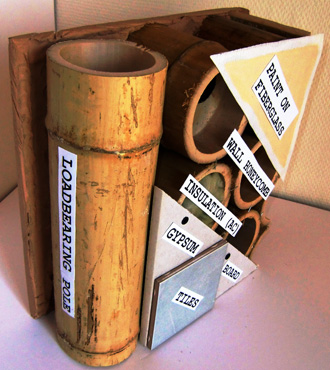
Honeycomb core
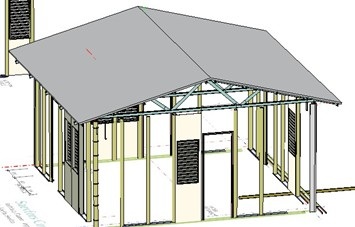
Loadbearing structure
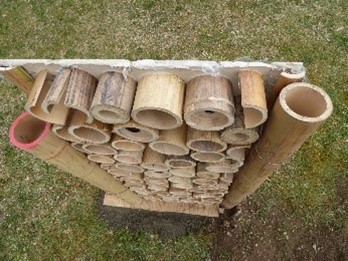
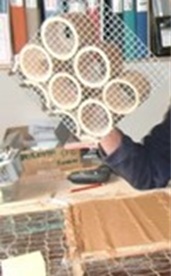
Honeycomb cluster
↑ Back to Top
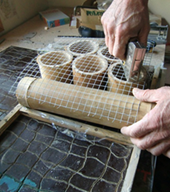
Staple, flip and dip in mortar
If bamboo culms are cut at the same length and placed on a chip board, a thin galvanized plaster grid can be stapled on top. The whole cluster of stubs can then be flipped upside-down and dipped in a plaster mix. A thin external ferro-cement skin is in this way created to protect the bamboo stubs.
The honeycomb concept allows for precise dimensional standards which is essential for prefab production and results in an equal wall thickness all over. In this way the natural irregularities of bamboo can be circumvented. Vertical bamboo poles provide the load-bearing structure. The honeycomb cluster in between, made from cross cut bamboo "left overs", makes an impact resistant wall. The same design principle is often used in aluminium shell manufacturing for aircraft. Supposedly these short pieces of bamboo could be sourced from bamboo sawmills or dealers at a very low price since they otherwise may be thrown or burnt as waste. If they are cut from long bamboo poles already treated , full protection is already there.

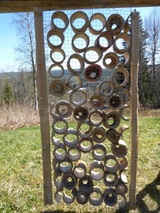
Honeycomb external skin
New construction methods based on bamboo can offer the urban style most people expect when leaving the rural poverty. Flush and planar walls, floor tiles in kitchen and modern bath rooms, thermal insulation for AC ; all is possible to combine with bamboo construction.
The honeycomb concept allows for precise dimensional standards which is essential for prefab production and results in an equal wall thickness all over. In this way the natural irregularities of bamboo can be circumvented. Vertical bamboo poles provide the load-bearing structure. The honeycomb cluster in between, made from cross cut bamboo "left overs", makes an impact resistant wall. The same design principle is often used in aluminum shell manufacturing for aircraft.
An exterior weather skin made from an 8 mm ferro-cement layer, or other climate shield, protects the bamboo from rains, humidity and ultraviolet radiation from the sun. Architects can have full freedom in designing colorful exterior wall patterns similar to plastered brick houses.
The interiors can be practically any standard material; gypsum boards, ceramic tiles, painted fiber-glass cloth, masonite.
The voids inside the honeycomb can be filled with thermal insulation materials in case AC is used, which would save dramatically on energy waste. If sound insulation is an issue or - bullet proof protection is needed - the space could be filled with sand.
Detailed manual...